Generate, Then Edit: A Repeatable Workflow for Small Business Marketing Visuals
A repeatable workflow for small business marketing visuals: pick the best AI image generator for drafts, then finish them in an AI image editor online.
 Eimantas Kazėnas Marketing & Tech
- Published
- 9 min read
On this page Why generate, then edit works
Independent and reader-supported. Some links may earn us a commission; it never changes our rankings. Editorial policy
A small business can burn through a lot of images in one week. One weekend promotion might need an Instagram post, a story, a website banner, an email header and a Google Business Profile update. Paying a designer for every one adds up fast, and stock photos never look like your shop.
AI image tools look like the fix. But plenty of owners end up with a folder of striking images they can’t actually post. The colors are off, the product looks wrong, or the text is garbled.
Usually the process is the problem. Generation on its own gets you close. Editing on its own needs a good picture to start from. Put the two together and you get something you can use: generate a strong draft, then edit it into a finished, on-brand asset.
Here’s a repeatable “generate, then edit” workflow for small business owners and lean marketing teams. It covers prep, prompts, picking drafts, editing, export and review, plus where it still falls short.
Why generate, then edit works
Image generators are good at scenes, moods and composition. They’re shaky on exact details: brand colors, what your product really looks like, clean text and precise sizes. Image editors are the reverse. They’re great at targeted fixes, but they need a solid image to work on.
So split the job. Let generation handle the idea and the layout. Let editing handle accuracy, brand fit and formatting. It’s faster than designing from scratch, and far safer than posting raw AI output.
Before you start: build a simple brand kit
A brand kit is what turns random AI experiments into a system. One shared document is enough. Put in:
- Your brand colors as hex codes.
- Your fonts.
- Your logo, in light and dark versions.
- Three to five reference images that show your style.
- A few style rules, such as “bright natural light,” “real-looking interiors,” “no neon” or “no faces.”
- Approved claims and phrases, so the marketing copy stays accurate.
Every prompt and every edit below should point back to this kit. It does more than anything else to make your AI visuals look like they came from one business.
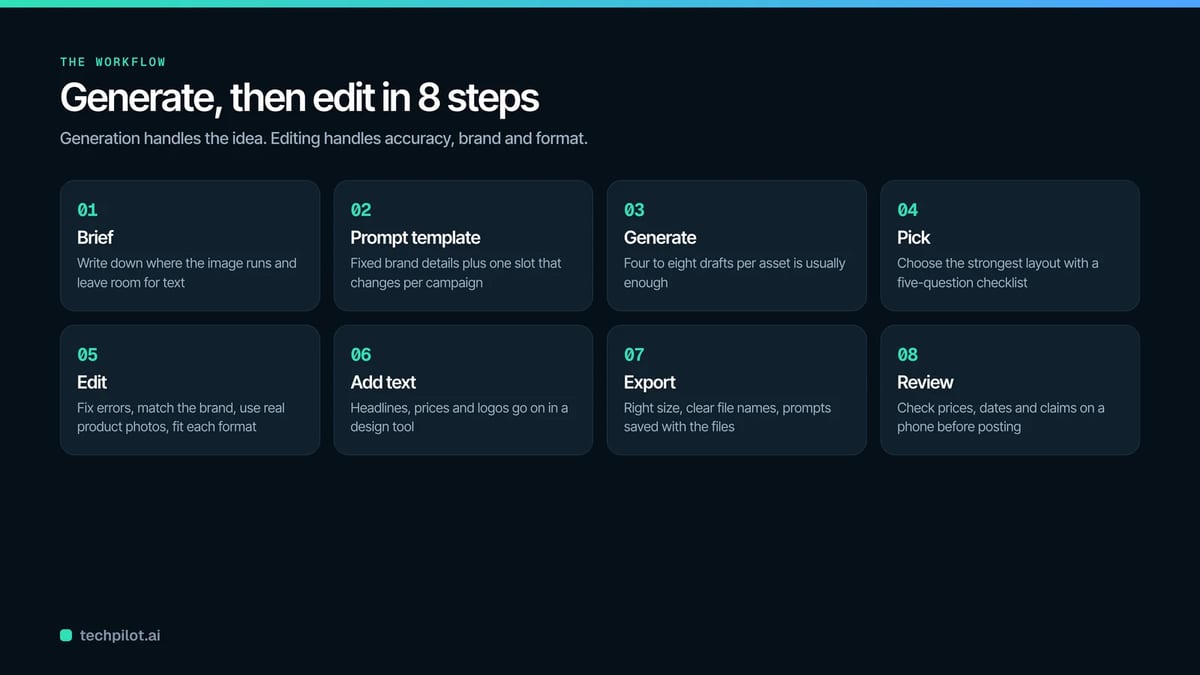
The 8-step workflow
Step 1: Define the asset and where it’s going
Before you generate anything, write down where the image will run and what it has to do. A short brief saves wasted generations and awkward crops later.
Each destination has its own shape:
- Instagram feed: 4:5 portrait, 1080 x 1350 pixels, is the safe choice. The app also accepts 3:4 (1080 x 1440), but scheduling tools stop at 4:5.
- Instagram Stories and Reels: 9:16, 1080 x 1920 pixels.
- LinkedIn link previews: 1200 x 627 pixels (1.91:1).
- Website hero banners: usually 1920 pixels wide or more.
- Email headers: usually designed around 600 pixels wide.
Platforms change these from time to time, so check current specs before a big campaign. Then note the message, the call to action, and where the text and logo will go. You’ll leave room for them when you generate.
Step 2: Write a reusable prompt template
Consistent prompts give consistent results. Build a template with fixed parts from your brand kit and a slot that changes per campaign.
A simple order works: subject, setting, lighting, mood, colors, composition, and what to leave out. For example: “A fresh sourdough loaf on a rustic wooden counter in a sunlit neighborhood bakery, warm morning light, cozy mood, cream and terracotta tones, loaf on the right third with empty space on the left for text, no people, no text, no logos.”
Save the prompts that work in a shared library, with a note on why. After a few months, that library is one of the most useful marketing files you own.
Step 3: Generate drafts
Generate a handful of variations. Four to eight per asset is usually enough to find a good starting point without wasting time or credits.
The best AI image generator for a small business isn’t the one with the flashiest demo. Look for:
- Good prompt adherence: it draws what you asked for.
- Realistic lighting.
- Support for reference images.
- Consistency across a series of images.
- Clear commercial usage terms.
ImagineArt is one option. It puts several image models in one place, including GPT Image 2.5 and Nano Banana 2.1, so you can see how different models handle the same prompt. Adobe Firefly and Canva’s AI tools are worth a look if your team already works in those apps.
Whatever you pick, test it with your own brand prompts before you commit. The right tool is the one that gives you usable drafts of your products, your space and your style.
Step 4: Pick a draft with a checklist
Picking by gut feel leads to rework. Run each draft through five quick questions:
- Is there room for text and a logo?
- Does the lighting match your style?
- Are the colors close to your palette?
- Any obvious errors, like warped hands, bent objects or garbled lettering?
- Would a customer recognize this as your kind of business?
Go with the strongest composition, even if it has small flaws. Editing can fix details. It can’t easily fix a weak layout.
Step 5: Edit for brand, accuracy and format
This is where a draft becomes a finished asset. Editing usually covers four jobs:
- Fix errors. Remove warped objects, clean up odd textures and correct anything that looks unnatural.
- Match your brand. Nudge colors toward your palette, adjust the lighting and remove anything that breaks your style rules.
- Get the product right. If the image shows your product, swap in or composite a real product photo whenever you can. Customers should see what they’ll actually get.
- Fit the format. Extend or crop the image for each destination without cutting off the subject.
For most small teams, an AI image editor online handles these jobs faster than traditional design software. In ImagineArt you describe the change in plain words to remove objects or swap a background, and outpainting can extend one image into other shapes: a 4:5 feed post, a 9:16 story and a wide website banner. Because it runs in a browser, anyone on the team can make edits from any computer without installing anything.
Step 6: Add text and logos outside the AI
Image models are getting better at text, but it’s still safer to add headlines, prices, dates and logos in a design tool afterward. That way the spelling is right, the fonts match and the details are correct.
Keep text short, high-contrast and readable on a phone. Put it in the space you planned for, and make sure it doesn’t cover the important part of the picture.
Step 7: Export, name and store
Export each asset at the right size and format for where it’s going. JPEG or WebP suits photos. PNG is better for graphics that need transparency.
Name files by campaign, platform and size, like weekend-sourdough-instagram-1080×1350.jpg. Keep the finished files next to the prompts and source drafts that made them, so you can update or reuse a campaign later. AI tools don’t always give the same result twice, so a saved draft is often easier to reuse than trying to recreate an image from the prompt.
Step 8: Review before you publish
Every asset gets a quick human check. Look at spelling, prices, dates and claims. Make sure product shots are accurate and nothing could mislead a customer. View it on a phone, because that’s where most people will see it. A wrong price or date can cost real sales.
For bigger campaigns, ask a second person to look. Fresh eyes catch what the creator misses.
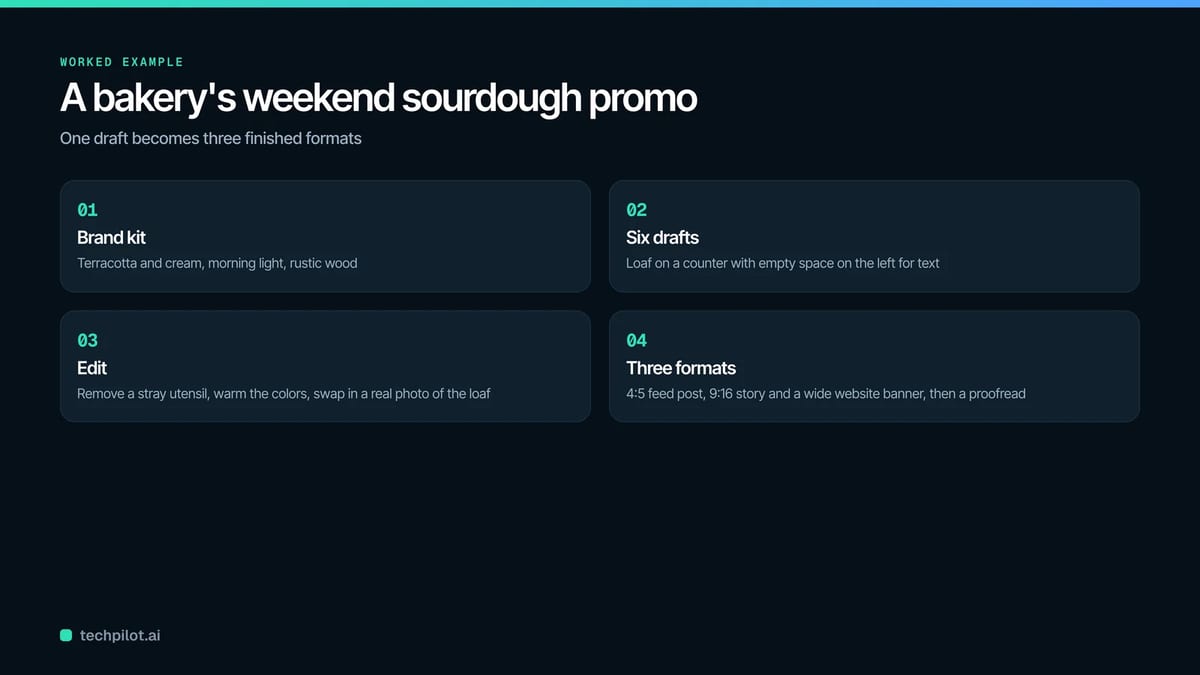
A worked example: a bakery’s weekend promotion
Say a neighborhood bakery wants to promote a weekend sourdough special.
The owner opens her brand kit: terracotta and cream, natural morning light, rustic wood. She runs her saved prompt template and gets six drafts of a sourdough loaf on a counter, with empty space for text.
She picks the draft with the best composition and edits it. She removes an odd-looking utensil, warms the colors a little and replaces the generated loaf with a real photo of her own sourdough. Then she extends the image into three formats: a feed post, a story and a website banner.
Last, she adds the headline, price and logo in a design tool, exports the files with clear names and asks a staff member to proofread before anything goes out. The whole set takes a fraction of the time a photoshoot and design round would.
Measure your own time and cost
Results depend on the business, the tool and the person using it, so measure your own process instead of trusting general claims. For each asset, track:
- Time from brief to approval.
- How many drafts you generated.
- Credits used.
- Rounds of revisions.
After a few campaigns, compare those numbers with what you did before, whether that was stock photos, freelancers or in-house design. You’ll see where AI saves time and where it still needs work.
Where this workflow falls short
Generate, then edit is useful, but it won’t cover everything.
AI can’t reliably show your specific products, people or locations without real photos. Customer testimonials, team introductions and behind-the-scenes posts should use real photography. Complex layouts, detailed infographics and brand identity work like logos still call for a professional designer.
Consistency can drift as tools and models change. Revisit your prompt library every so often, and refresh your reference images when your brand changes.
Rights, disclosure and trust
Before you use AI images commercially, read each tool’s terms and check that your plan includes commercial use. Free tiers don’t always: ImagineArt’s free plan, for example, is limited to personal use, and its paid plans add commercial rights. Avoid prompts that name other brands, celebrities or specific artists.
Be straight with customers. Don’t use AI to make a product look bigger, better or more effective than it is. Some platforms require labels on realistic AI images, so check the rules for each channel you post on.
Common mistakes to avoid
- Skipping the brand kit, so every image looks like it came from a different business.
- Posting raw AI output with no edit and no review.
- Showing generated products instead of real product photos.
- Asking the generator to render text instead of adding it afterward.
- Ignoring platform sizes until the final export.
- Not saving prompts and source files for next time.
FAQ
How many drafts should I generate per asset?
Four to eight is usually enough. Generating more tends to slow the decision without improving the result.
Do I still need a designer?
For everyday social and website visuals, many small businesses can handle production themselves. Designers are still worth it for branding, complex layouts and big campaigns.
Can I use AI images commercially?
Usually, yes, but it depends on the tool and the plan. Some free tiers are personal use only. Read the terms before you publish.
What should I look for in an AI image generator for my business?
Prompt accuracy, realistic lighting, reference image support, consistent results across a series and clear commercial terms. Test it on your own products and style before you commit.
Why use a browser-based image editor instead of desktop software?
There’s nothing to install, it works on any device, and several people can work on the same visuals. Desktop software still gives you more manual control for complex design work.
Final thoughts
AI image tools pay off when they sit inside a clear process. Generating gives you speed and ideas. Editing turns the draft into an accurate, on-brand asset.
Build a brand kit, save prompts that work, pick drafts with a checklist, edit for accuracy and format, add text separately and review everything before it goes live. Once that’s routine, you can turn out consistent, professional visuals every week without starting from scratch.
Found this useful? Share it with someone comparing AI tools.